The Whole Slide Viewer is an easy and fast viewing and annotation tool for digital tissue slides. Unless other proprietary tools, the Whole Slide Viewer provides unified settings and layout for various third party tissue scans.
The Whole Slide Viewer enables simple and user-friendly annotation functionality for pixel-accurate annotation of images. Sharing labels and automatic processing is fully supported.
Historically, the Whole Slide Viewer arose from the Memorial Sloan Kettering Cancer Center (MSKCC), New York, USA, between 2015 and 2020. Since 2021, a branch of it is continued at the Technical University of Munich (TUM), Germany, as a professional tool for collaborative and cutting-edge research in digital and computational pathology.
The Whole Slide Viewer can use single-sign-on (SSO) from many research insitutions, but not all institutions are currently listed. If you cannot find your institution in the list on the login site, please contact us and we can check if your institution can be added.
Yes, we provide a current cheat-sheet here.
- Clinic: The default is to open a slide via CoPath.
- Research: If you are in a project folder, you will see all available files in the thumbnails view. Click on a thumbnail to open that slide.
- Research: If you are in a project folder, your can also Drag and drop a local file into the window to upload the file to the current directory on the server.
- Advanced: A slide can also be opened via the URL https://slides.path.med.tum.de/viewer?ids=IMAGEID.svs, where IMAGEID is the image ID (e.g. ids=123456.svs). The IDs can be a semicolon separated list. More options are available for the URL, please contact us for more information.
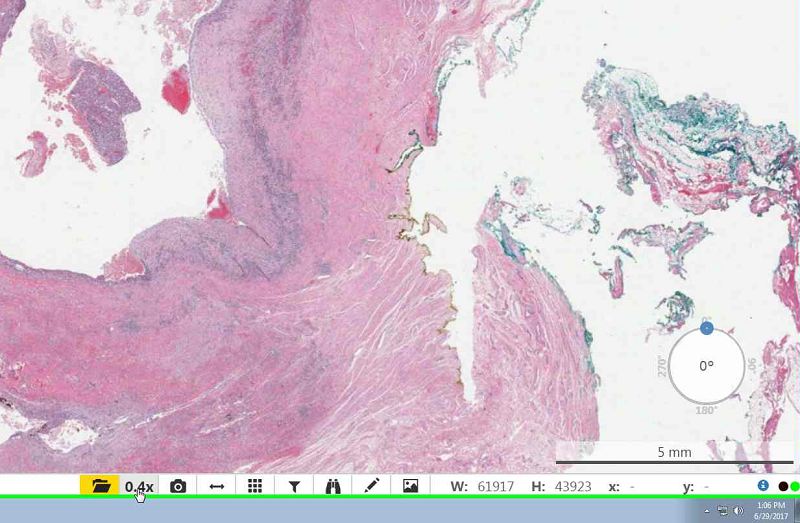
- In order to view a different section, click and drag the slide to your desired position.
- To zoom in you may double click on the slide or scroll up with your mouse.
- To zoom out scroll down with your mouse.
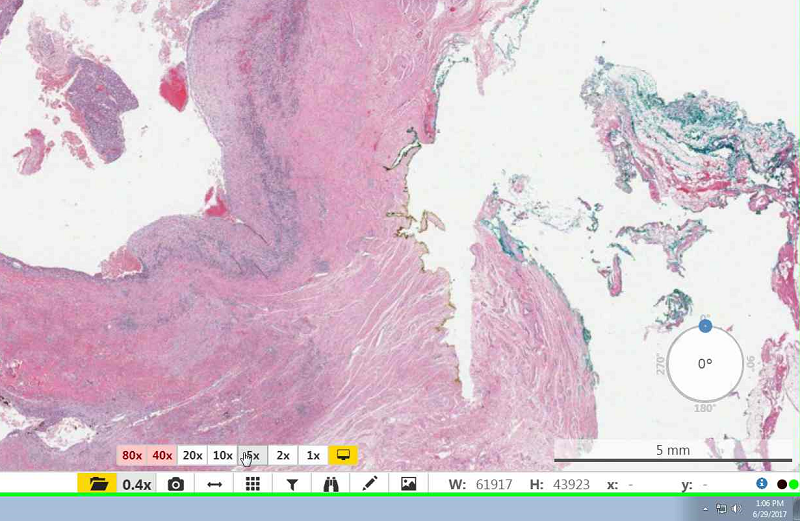
- To select a specific magnification select the magnification icon then select your preferred magnification.
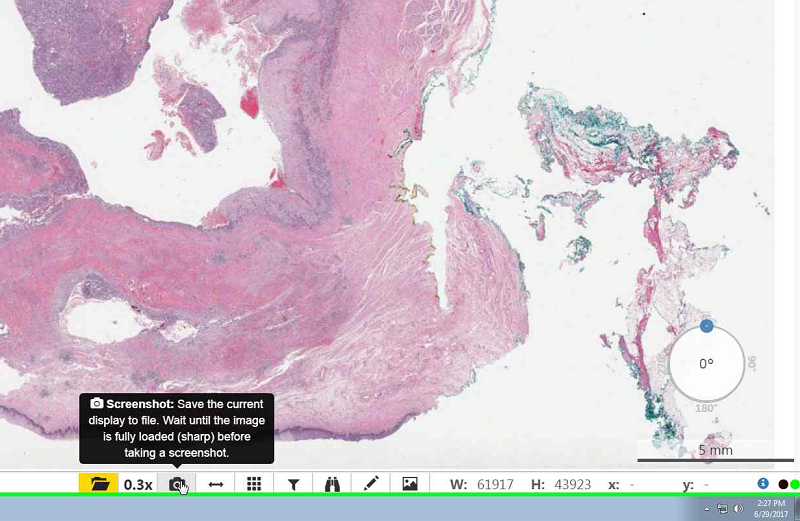
Select your prefered size, position and format.
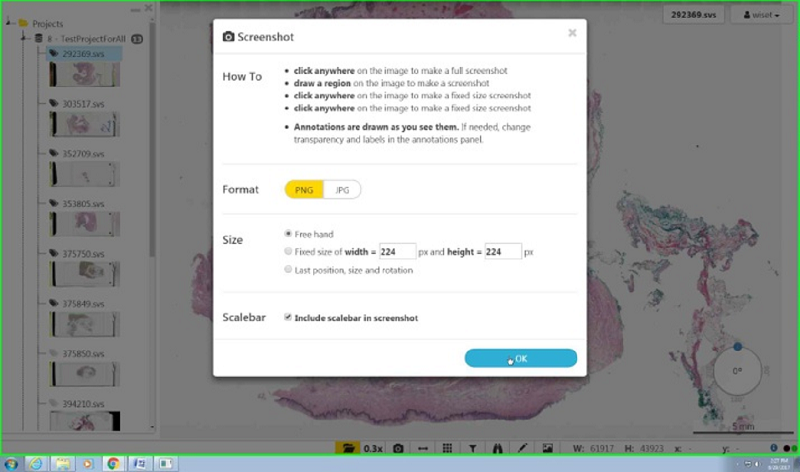
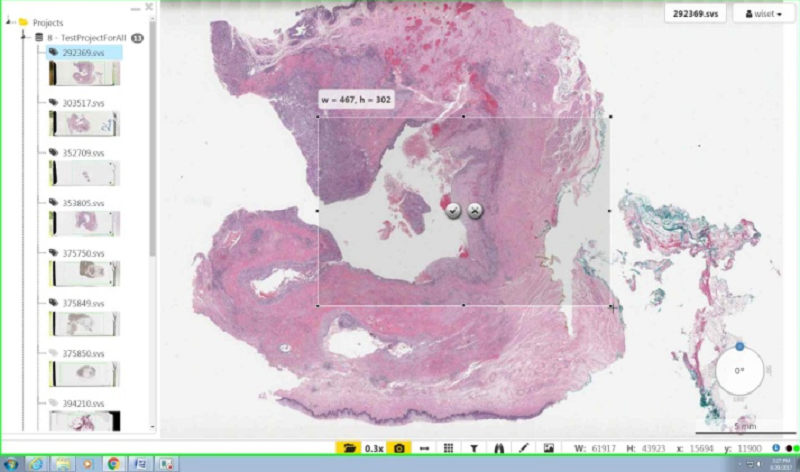
After pressing ok, click and drag in order to select the size and position of the area you would like to capture.
Scanners from different vendors might scan at different resolutions, even for the same x-number. E.g. Aperio usually scans 20x at 0.45 mpp, while Mirax scans 20x at around 0.3 mpp. This results in much larger images for Mirax at 20x.
We account for the inter-vendor diversity and normalize all x-numbers to match 0.45 mpp at 20x. Therefore, 20x appears similar large throughout all vendors.
Select a label color.
- Change the name of a label color by clicking the pencil icon on the right of the label name
- Add new label colors by selecting 'add more'
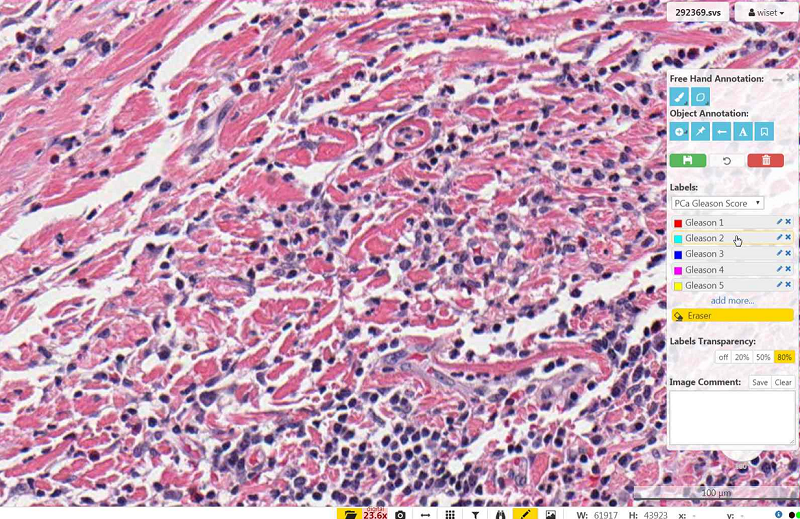
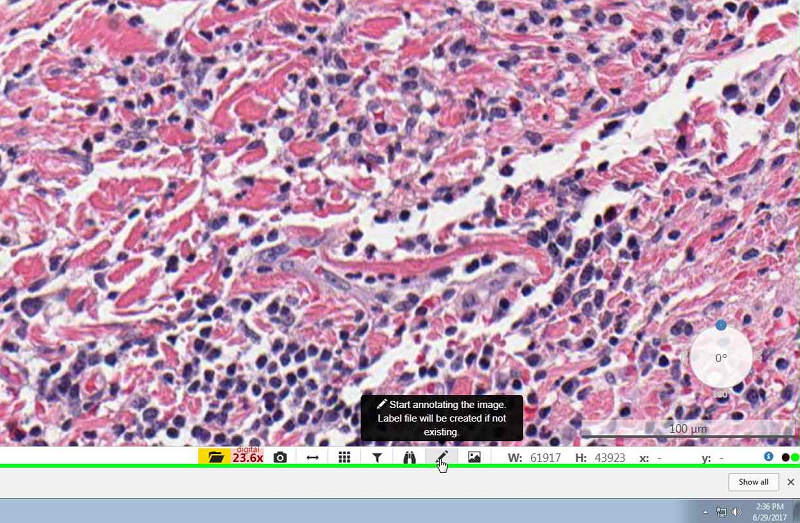
To draw an annotation select either the free hand or filled brush
- The filled brush allows you to draw an outline that gets automatically filled.
- You can change the size of the brush by clicking the triangle in the lower right corner of the brush icons and then adjusting the slider to change the size.
- To move an annotation click and drag the part of the drawing that you would like to move.
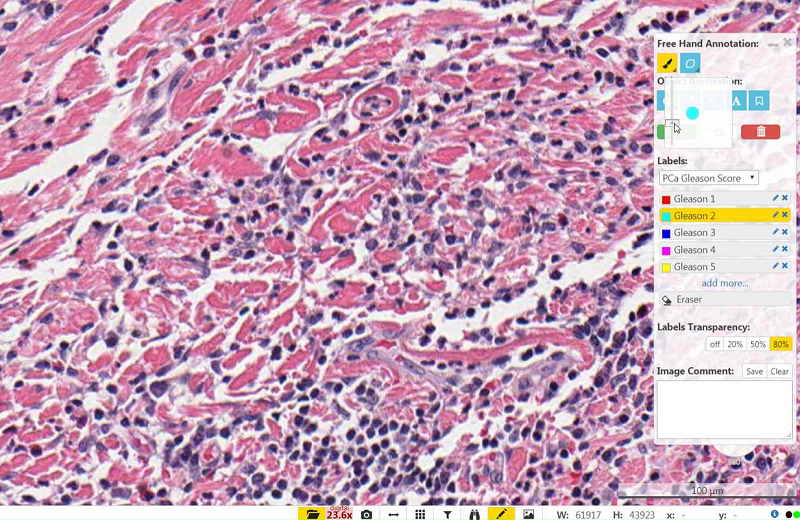
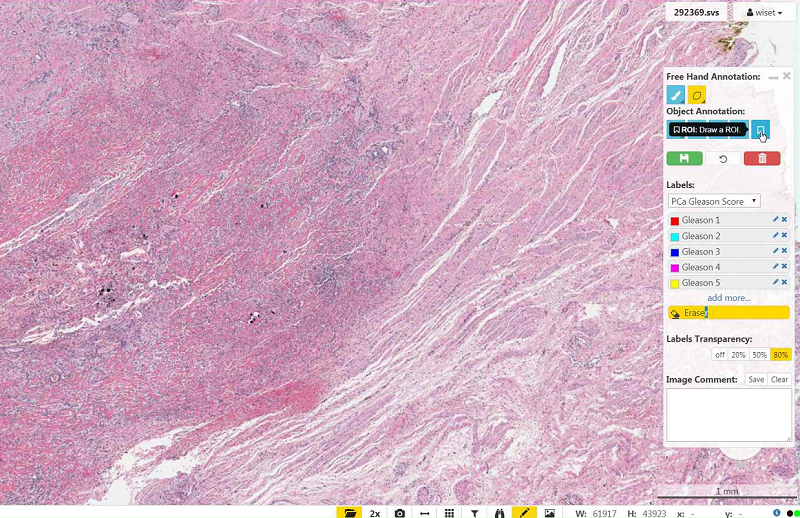
The object annotations allow you to place icons or text at specific points in the screen by selecting the object you want and then clicking on a point in the screen that you would like to annotate.
To delete an individual object, select the object and then press delete on your keyboard.
To mark an object with a label color you can select the ‘+’ icon, select a label color and adjust the icon to the size of your choice with the size slider bar.The pin allows you to place a red pin at a specific point in the image.
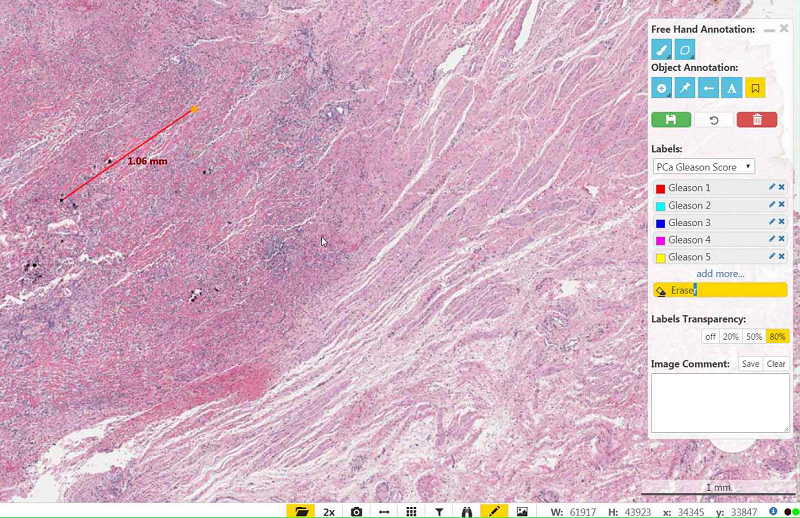
The arrow allows you to draw an arrow to a specific point.
- To change the size of the arrow left click on the center of the arrow after you have placed it on the screen until a blue box appears around the arrow and then drag the corners of the box.
- To add a text label to the arrow double click on the center of the arrow until a text box appears.
- To change the size of the text click once and then drag the blue box until its at your preferred size.
- To edit the text double click on the textbox.

- Be sure to select the right color (Tissue Type), and not the Earaser.
- Be sure the Brush Width is not too small (the circle right the the Brush Width slider indicated the thickness).
- Be sure to set the "Unsaved Drawings Transparency" to a non-zero value (0 means invisible).
- Wait a little bit: After moving or newly annotating, the tiles of the label file are loaded in the viewer in background. During loading, an internal paint method is called, destroying the current brush. When all tiles are loaded, the brush is visible while drawing.
-
The BMP label file (drawings) of a user can be downloaded as indexed 4bpp BMP file (original, for computation, large filesize) or as PNG file (resampled as 32bpp image for visualization, smaller filesize) with
- https://slides.path.med.tum.de/slides/USERID/projects;1;123456.svs/getLabelFileBMP
- https://slides.path.med.tum.de/slides/USERID/projects;1;123456.svs/getLabelFilePNG
NOTE: The BMP and PNG label file can only be downloaded if it is not opened by another user (e.g. when the user is annotating simultaneously the same slide, or opened it recently, it will give an error. The labelfile will be blocked for 10 minutes (timeout)). -
The vector labels (nuclei, pins, arrows, ROI, etc) can be downloaded in JSON format (coordinates plus label specific information such as class, text, etc) with
- https://slides.path.med.tum.de/slides/USERID/projects;1;123456.svs/getSVGLabels/nucleus
- https://slides.path.med.tum.de/slides/USERID/projects;1;123456.svs/getSVGLabels/pin
- https://slides.path.med.tum.de/slides/USERID/projects;1;123456.svs/getSVGLabels/text
- https://slides.path.med.tum.de/slides/USERID/projects;1;123456.svs/getSVGLabels/arrow
- https://slides.path.med.tum.de/slides/USERID/projects;1;123456.svs/getSVGLabels/rectangle
- https://slides.path.med.tum.de/slides/USERID/projects;1;123456.svs/getSVGLabels/roi
where
USERID is the user ID in the viewer of the user who made the annotation, and
1;123456.svs is the project ID (here '1') and filename (here '123456.svs') of the slide (can also be with path: 1;SUBFOLDER;123456.svs).
The viewer will report if the slide or annotations could not be found.
- L: The labelers annotate the slides as usual.
- L: After finishing, they tell the supervisor that he can review their labels.
-
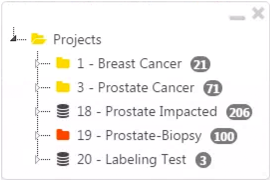
S: The supervisor logs in and opens the project. Projects which he or she supervises will be highlighted in red (see project 19 in the example image).
-
S: The supervisor has now access to the labels of the two labelers (indicated with their user ID).
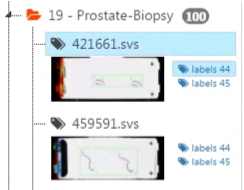
- S: After click on another user's label link, the supervisor can see and edit all labels from that user. All changes made with the annotation panel will be saved in the other user's database.
-
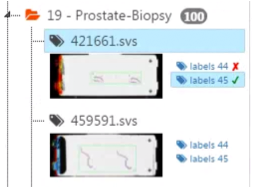
S: Besides editing the annotations of the other user, the supervisor can approve ('OK') and disapprove ('REVISE') the labels with two buttons on bottom of the annotation panel (see image).

-
S: The supervisor can see that he or she approved or disapproved a specific annotation by a small sign (✓, ✘) next to the user ID.
-
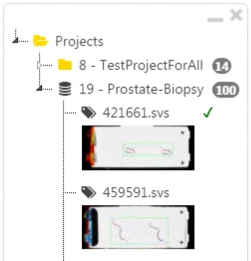
L: The labeler will then see the edited information, as well as a small sign (✓, ✘) next to the filename, such that he or she can revise the annotation accordingly.
- Step 2-8 can be iterated until the annotations are of highest quality ;)
- Tipp: To exchange text messages between supervisor and labeler, use the comment box in the annotation panel (see image in step 6).
- Right mouse click on the project -> "Export Project"
If your project uses physical slides (non-clinical), please contact us.
If your project uses linked files, you can edit the project and subfolders as follows:
-
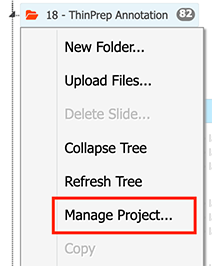
Right mouse click on the project -> "Manage Project...":
-
Edit the project as needed.:

- Project ID: Cannot be changed (assigned at creation of project).
- Title: As shown in the file tree in the viewer (required).
- Description: Description of the project (optional).
- Preview: Which preview images should be shown in the file tree?
- Accessing Users: add or remove users to the project. Can only be edited by project owner or admins.
-
Linked Files:
Add or remove here slides (Can only be edited by project owner or admins).
- Slides are listed by their image ID.
- Each row for one slide.
- The semicolon indicates folders (e.g., "path;to;12345" will create a folder structure path/to/12345.svs).
- TIPP: For better editing, you can copy the whole content of the text box, edit it with a better text editor, and paste it back to the box.
- Click Save.
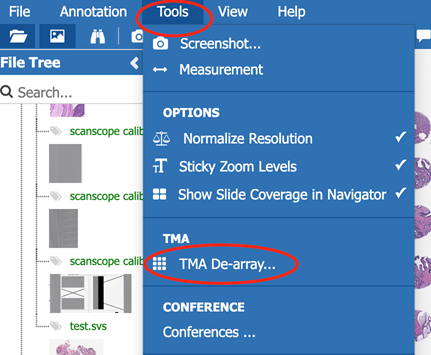
-
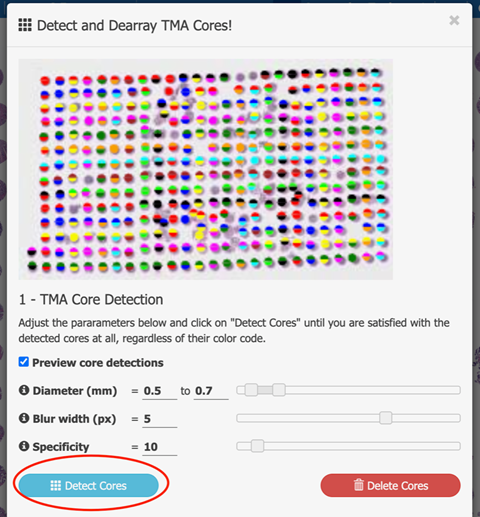
First, detect the cores itself by adjusting radius and specificity. A blurr filter can be applied to soften the image, which might lead to better results.
-
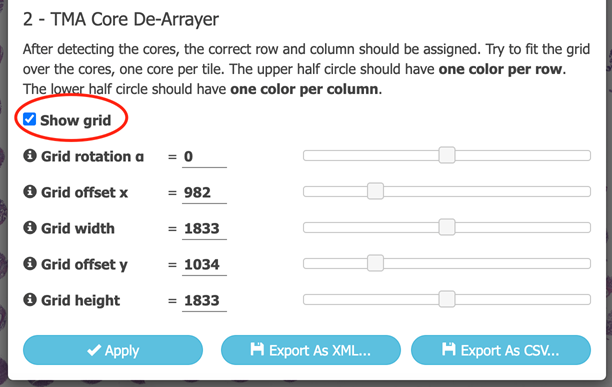
After the cores are detected, assign the cores to the correct rows and columns. This is done by overlaying a adjusting a grid over the image.
The grid can be rotated and sized such that each core occupies one cell in the grid. The color code of rows (upper color) and columns (lower color)
of each core facilitates the adjustments.
Including the viewer in your application is as easy as opening a link to the image IDs, e.g.
where- ids are the slide IDs to be opened (either one or a semicolon separated list),
- annotation (on* | off) (optional) determines if the annotation control is shown or not,
- rotation (on* | off) (optional) determines if the rotation control is shown or not,
- toolbar (on* | off) (optional) determines if the toolbar is shown or not,
- filetree (on* | off) (optional) determines if the filetree is shown or no (recommend off when there is only one ID, on otherwise),
- fileinfo (on* | off) (optional) determines if the small overview window control is shown or not,
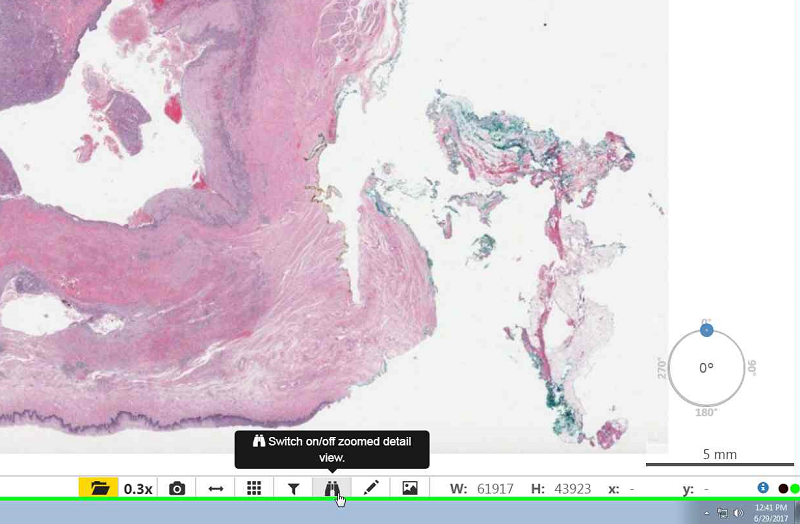
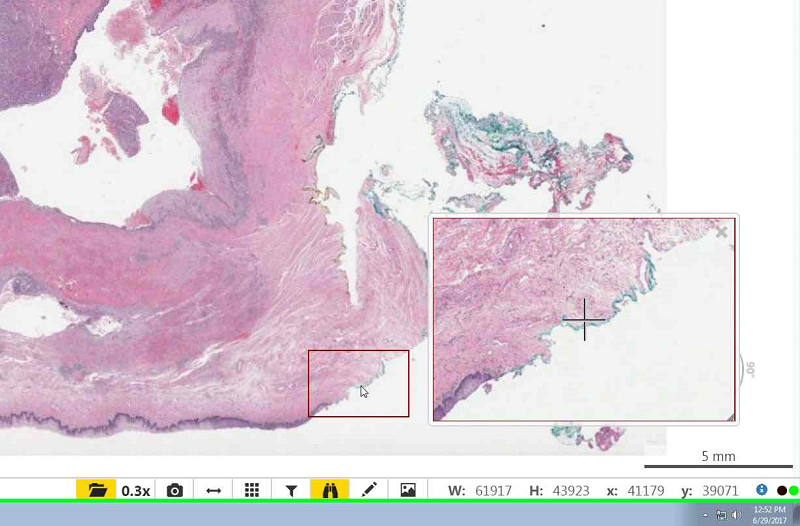
- magnifier (on | off*) (optional) determines if the magnifier is shown or not.
- digitalzoom (on | off*) (optional) determines if digital zoom is enabled or not.
- user (optional): You can add
&user=USER@tum.dein the link if you have the user already logged in in your system (e.g.&user=aa111bbb@tum.de). The user will then be logged in as well in the viewer, allowing e.g. for annotations, for access to their projects, or for their preferred settings. - You can open this link e.g. in an iFrame, new tab or window.